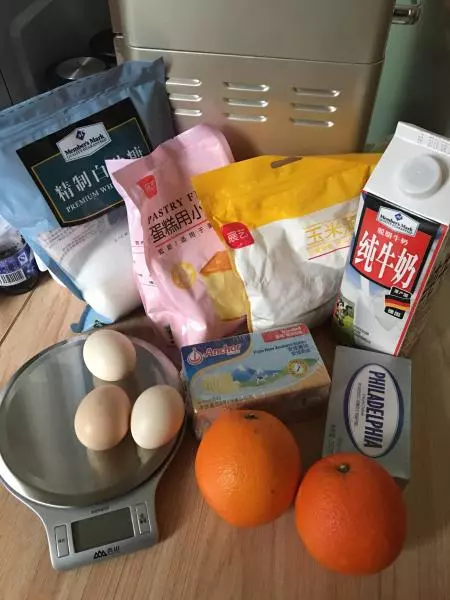
原料
贛南臍橙: 2個, 雞蛋50g左右: 3個, 低筋麵粉: 50g, 牛奶: 120ml, 奶油奶酪: 125g, 黃油: 50g, 細砂糖: 40+20g
步驟
1準備好材料,這是三能8寸愛心模具的分量,8寸圓形可以*1.3倍。玉米澱粉可以加10g左右混合在低粉里降低筋度,也可以全部用低粉,確保粉的總量不變。
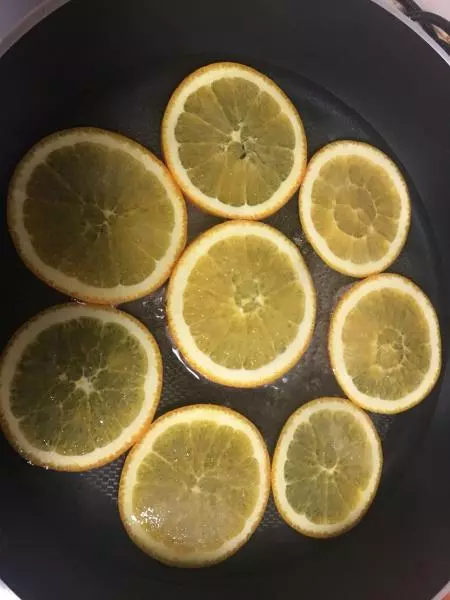
2橙子用鹽擦洗,在鹽水浸泡洗乾淨外表。建議選大小中等,皮薄的橙子,切開比較好看。如果刀工比較差的話請多準備幾個橙子。

3加入20g白糖放剛好漫過橙子高度的水中火煮沸,(可以用奶鍋)直至橙皮變成透明,期間起了泡沫要用勺子撈掉,這樣橙皮不會苦,煮好的橙子連皮都是可以吃的。
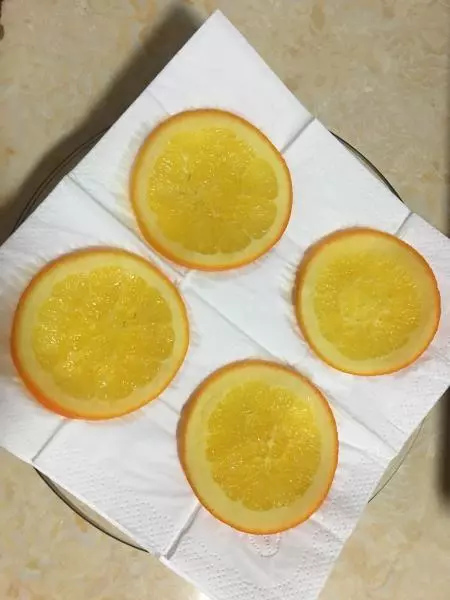
4煮好後最好用廚房紙吸干水分,沒有廚房紙的請用最好的面紙,畢竟是要吃的東西。水分儘可能吸干,用不完的可以放冰箱冷藏。
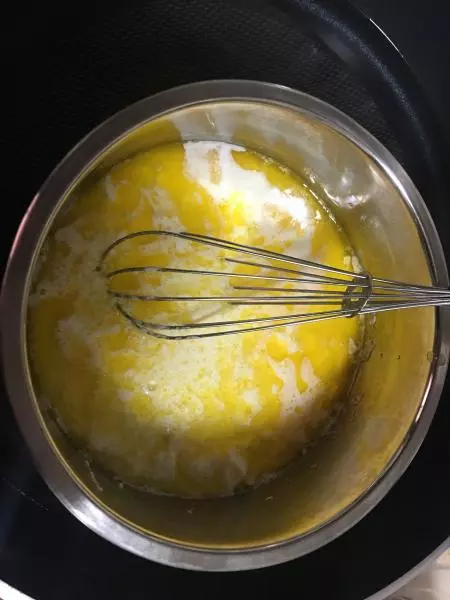
5黃油隔熱水融化。如果蛋糕模具非不粘模具的話可以刷少量黃油在模具里,方便脫模。
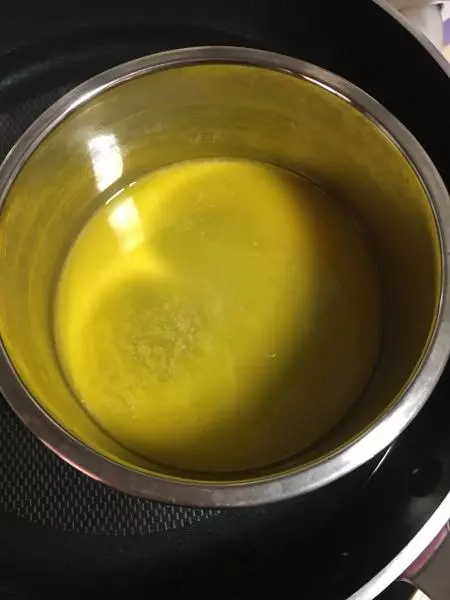
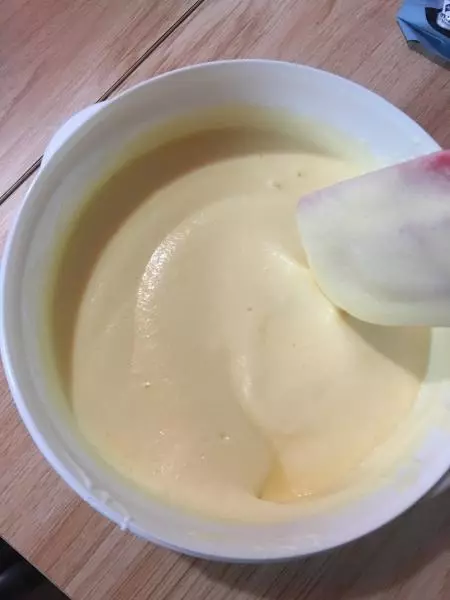
6再加入奶酪、牛奶,繼續融化攪拌勻。
7將蛋白和蛋黃分離,蛋白里不要有蛋黃。
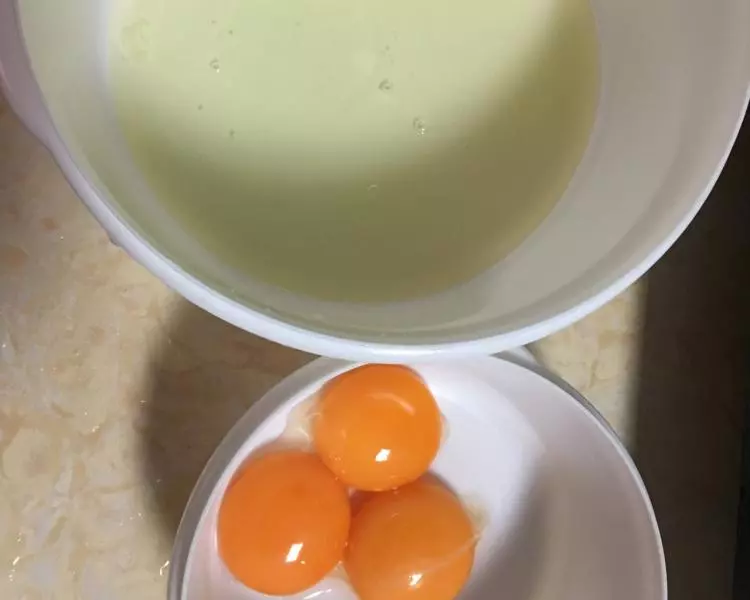
8用手動打蛋器將蛋黃攪拌勻,再加入之前攪拌好的奶酪糊中。

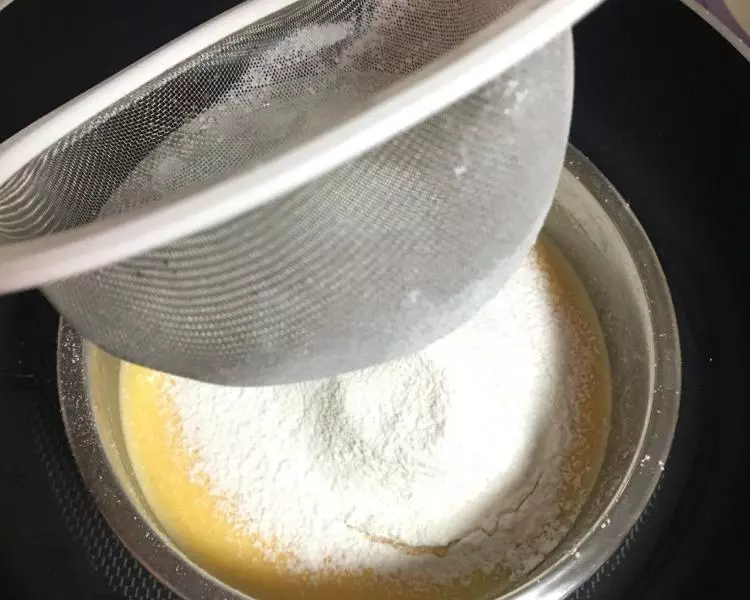
9篩入低粉,然後用手動打蛋器攪拌至沒有顆粒的狀態,跟戚風一樣,不要劃圈攪拌,避免起筋。
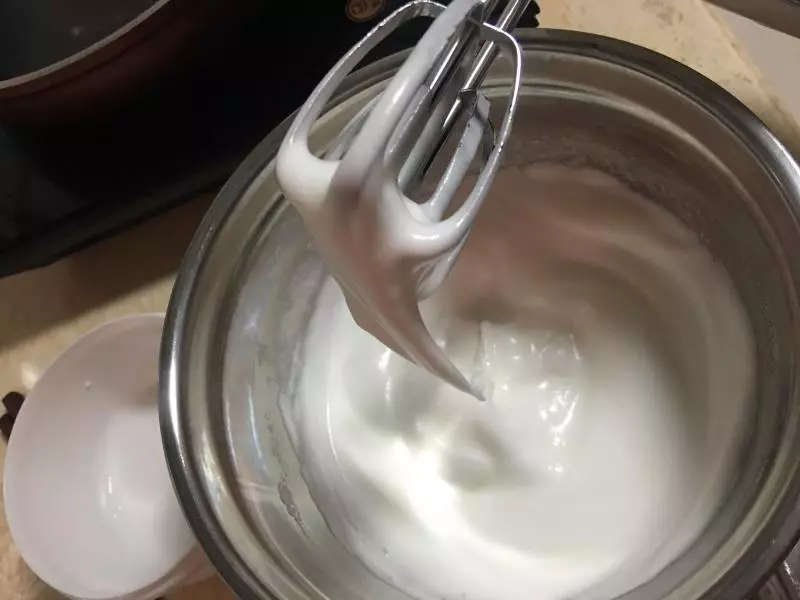
1040g細砂糖分2次倒入蛋白中,打至濕性發泡狀態,濕性發泡就是所謂的大彎鉤,注意不要打成戚風那樣的小尖角,這個狀態跟蛋糕卷的蛋白狀態差不多。
11烤箱180度預熱十分鐘。 用刮刀舀兩勺蛋白糊混入蛋黃麵糊中,「之」字型翻版均勻,再把所有蛋黃糊倒入蛋白糊中,繼續翻拌均勻。
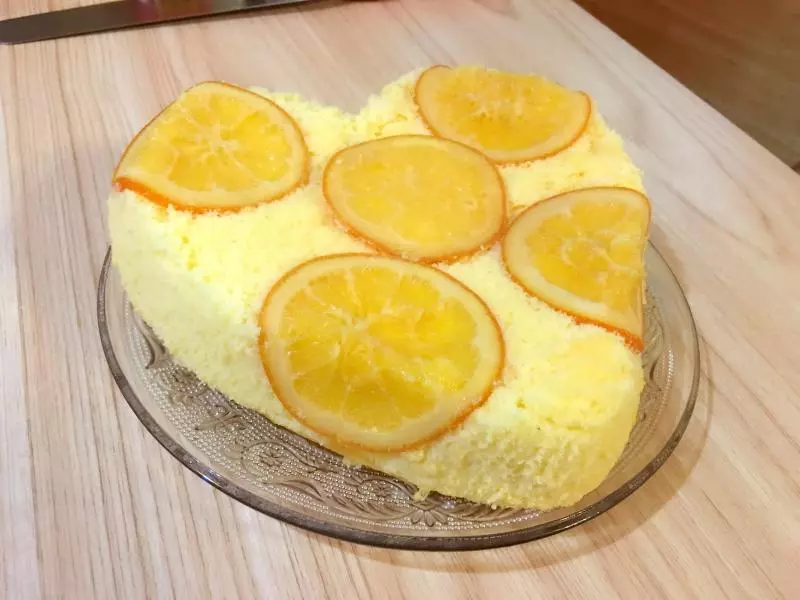
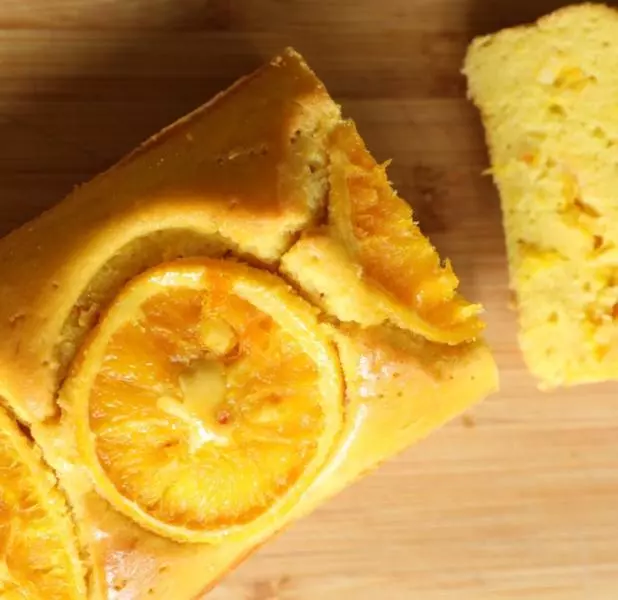
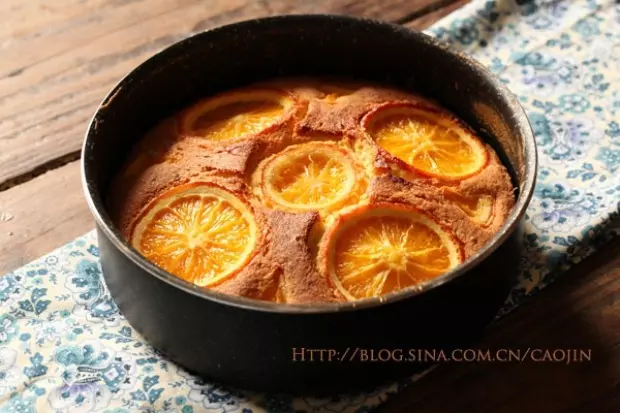
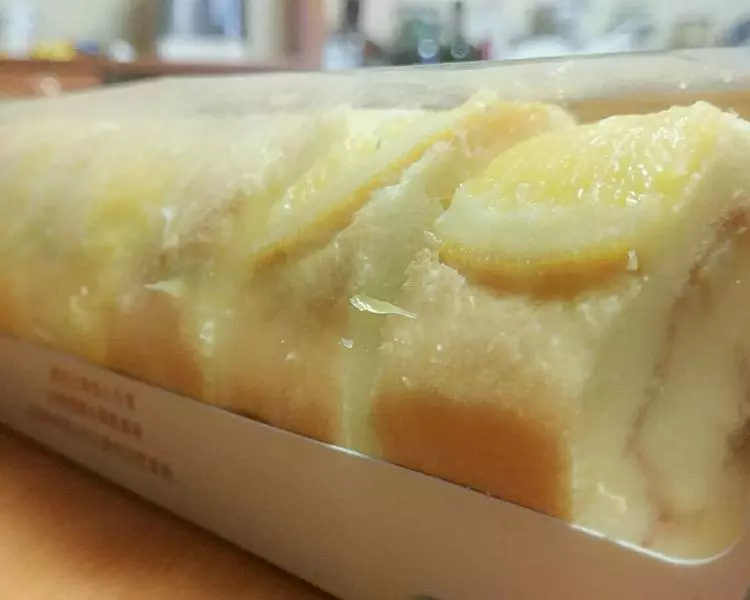
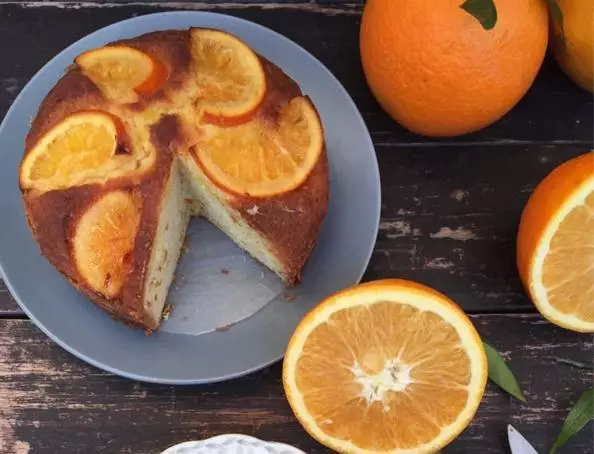
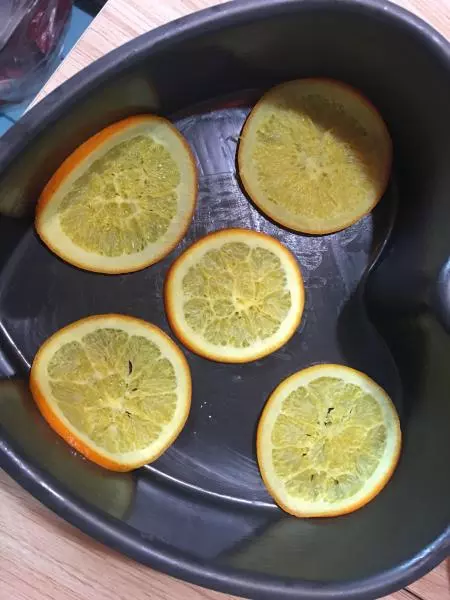
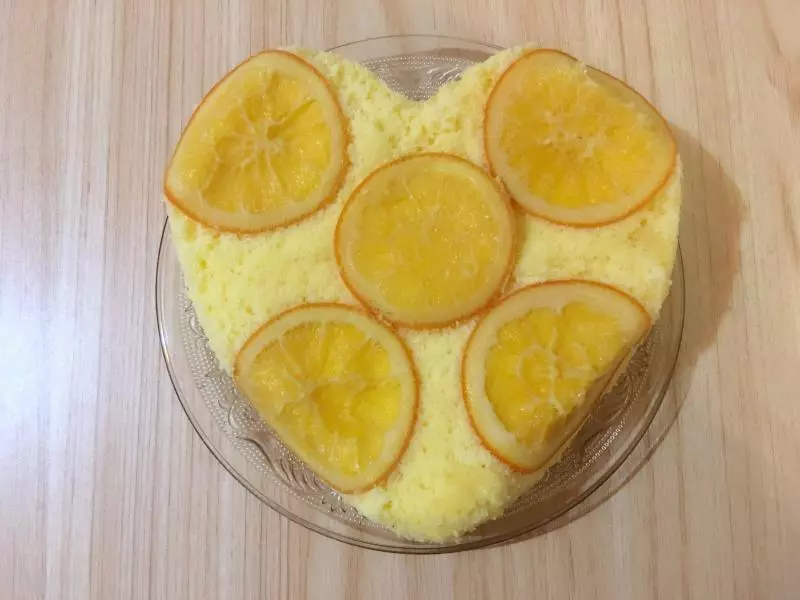
12模具中放入橙子片,把位置儘量固定一下。
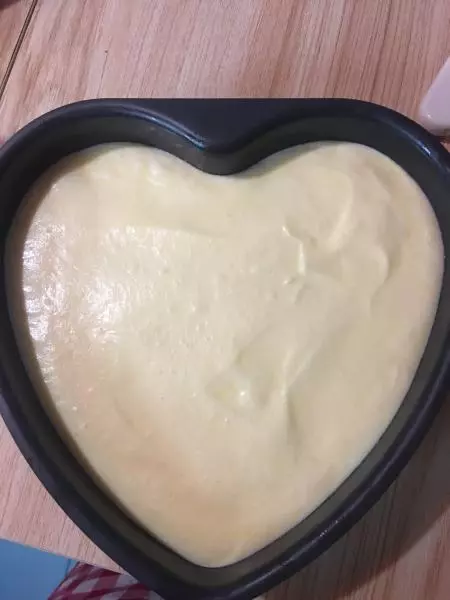
13倒入最終的乳酪蛋糕糊,稍微刮平表面。
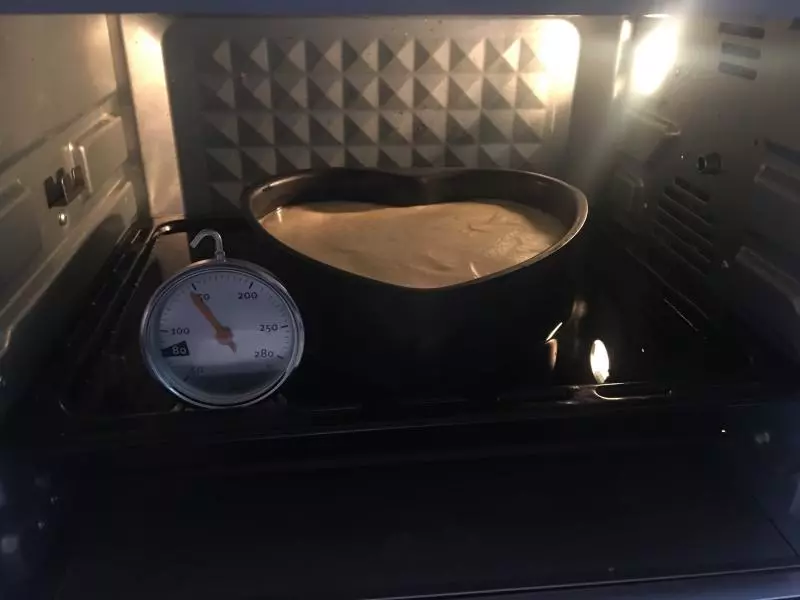
14中下層或中層,烤盤上倒入少量水,將模具放入盛著水的烤盤上,據說水浴法烤乳酪蛋糕會更嫩滑。我的烤箱溫度調180度,實際溫度120度1小時。 取出時用牙籤扎一下中間看有沒有全部烤熟。
15取出倒扣就完成啦,固定底真心不太好脫模,還是活底比較實用,但活底如果水浴法的話外面要包一層錫紙防水。
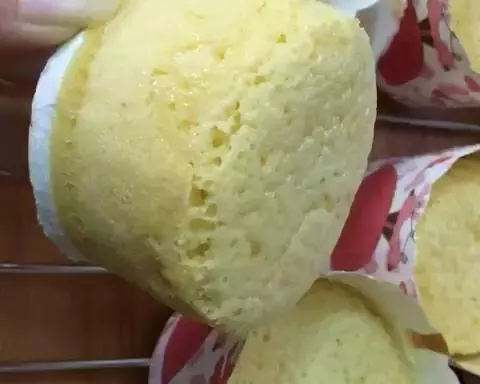
16口感軟軟的比戚風好吃呢