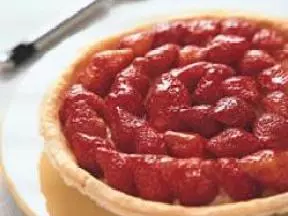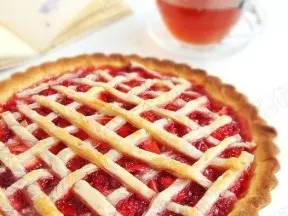
简介
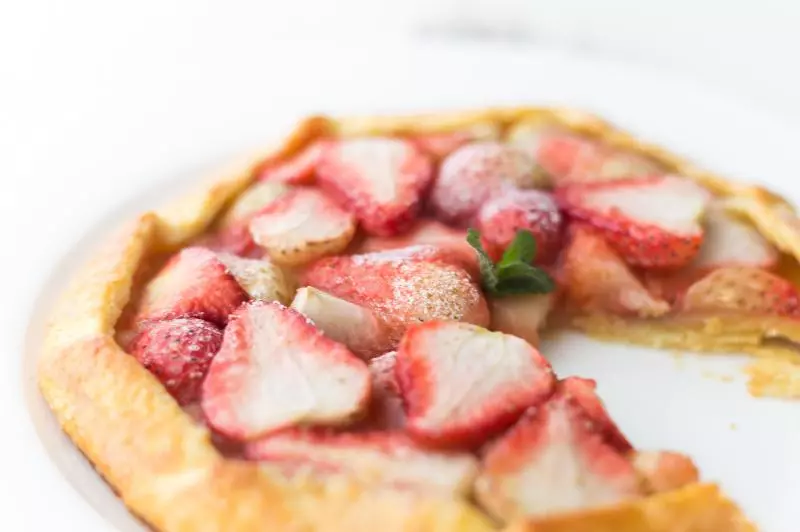
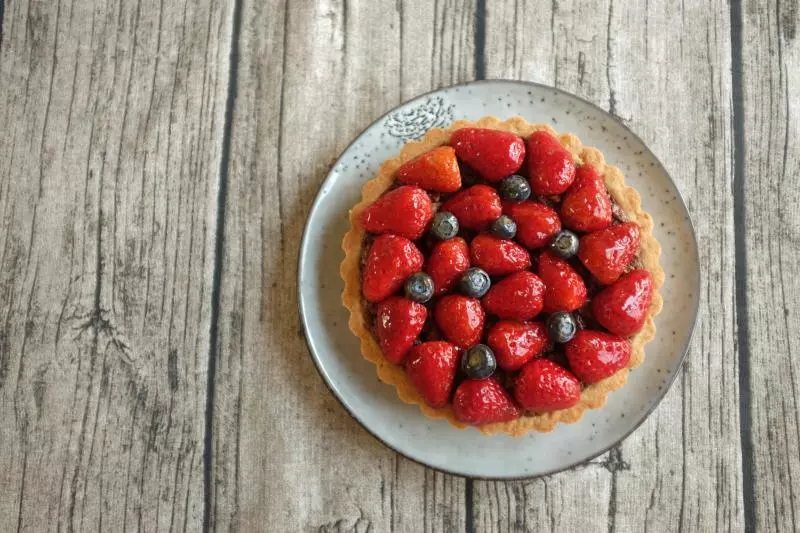
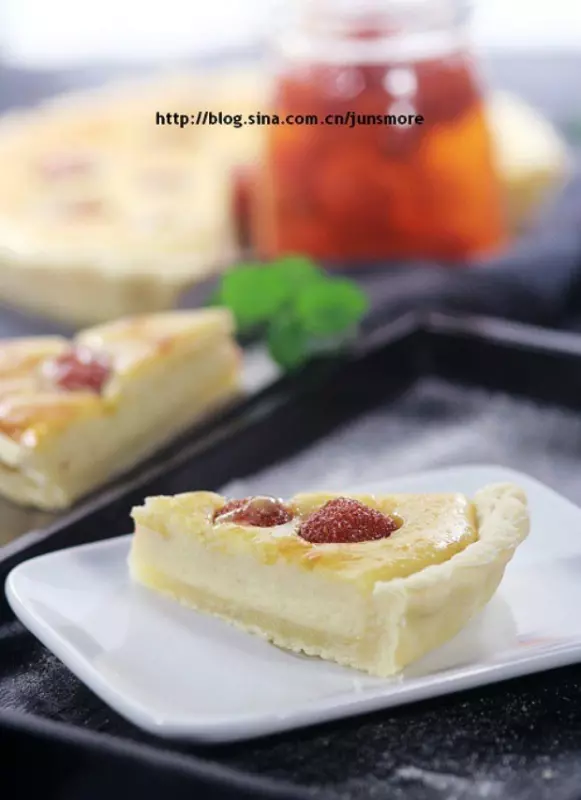
超香酥派皮,超浓郁派馅---今天这款派,派皮做法与博客里以往介绍的派有所不同,口感非常浓郁酥松,而使用了足量奶油奶酪的派馅,当然更是浓郁,很适合秋天。不过,你会问了,这个季节没有草莓,这草莓派是怎么做出的呢?——往下看,就知道了哈。
参考分量:6寸派1个
原料
低筋面粉 100克, 奶油奶酪 120克, 罐头草莓 数粒, 黄油 50克, 盐 1克, 冷水 15克, 鸡蛋 1个, 细砂糖 25克, 草莓罐头糖水 2大勺(30ML), 香草精 1/4小勺(1.25ML)
步骤
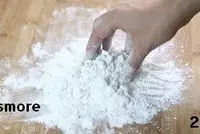
1把刚从冰箱拿出来的黄油切成小丁备用(注:黄油不要软化)

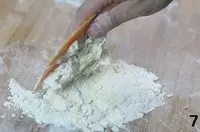
2倒入过筛的低筋面粉和盐,用手稍抓匀,让面粉均匀的裹在黄油上
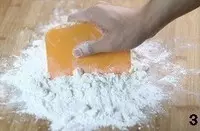
3用刀或者刮板不停的切拌黄油面粉,如同我们剁肉馅一样,将黄油切成尽量细的颗粒
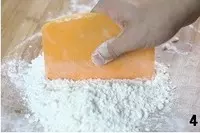
4把黄油面粉切成类似粗砂粒的状态就可以了
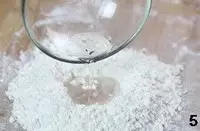
5把面粉堆好,中间挖一个洞,倒入冷水
6用刮板不停的压拌面粉,使面粉和水混合均匀
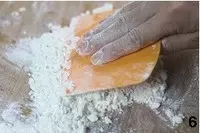
7如图所示,不停的压拌,使面粉与水分、黄油混合得更充分
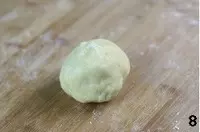
8拌到没有干面粉的时候,用手揉成面团,放在室温下静置1个小时备用
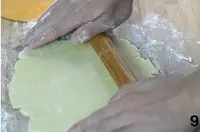
9面团静置好以后,放在案板上擀成薄片(撒一些干面粉防粘)
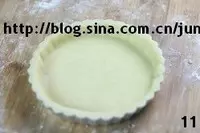
10将面片小心的拿起来,铺在派盘上
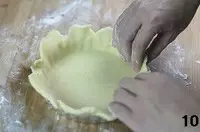
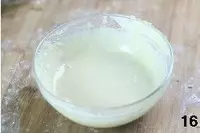
11除去多余的派皮(多余的派皮怎么办?看这儿哈)
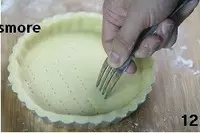
12在派皮底部用叉子叉一些排气小孔,放置15分钟让派皮松弛一会儿。然后放入预热好上下火190的烤箱,中层,烤15分钟,至表皮微微发黄(烤之前可以在派皮里铺一些红豆、洗净的石子等重物,防止派皮烤的时候鼓起来)
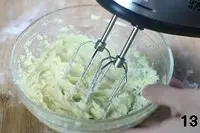
13派馅的制作方法:奶油奶酪室温放至软化(或隔水加热至软化),加入细砂糖,用打蛋器搅打至膨松顺滑
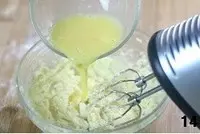
14分2-3次加入打散的鸡蛋,并继续用打蛋器搅打至顺滑
15加入草莓罐头糖水及香草精

16搅拌均匀即成派馅。将派馅静置半个小时以上
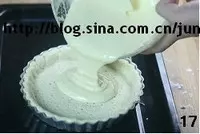
17派皮烤好以后,把静置好的派馅倒入派皮
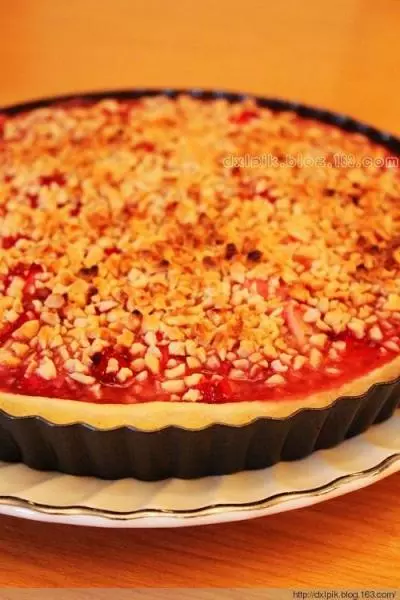
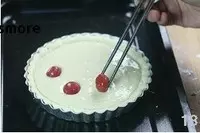
18在派馅里铺入数粒擦干了水的罐头草莓。可根据自己的喜好决定草莓的用量。把派放入预热好上下火155度的烤箱,中层,烤35分钟左右,直到派馅完全凝固,表面呈现微金黄色即可出炉
小技巧
1、这个季节没有新鲜草莓,因此制作草莓派的时候,我使用了罐头草莓。而使用水果罐头也是很多时候我们想要做水果派时最方便的选择,尤其是没有应季新鲜水果的时候。 2、这款派的派皮非常酥松可口,需要注意的是,在制作派皮的时候,使用的是没有软化的硬黄油哦。派皮面团做好后,不要揉太久的时间,否则会影响派皮的酥松程度。 3、派皮一共要烤两次,先烤一次,填入派馅后要再烤一次。第一次烤的温度要远高于第二次,以保证派皮的干爽酥松。 4、填入派馅以后再烤时,要用较低的温度,慢慢烤,使派馅凝固。派馅烤的时候有轻微的开裂是正常的,出炉后会平复。如果开裂得比较严重,说明烤箱内温度过高,请降低温度再试试哈。 5、换成其他的水果罐头(如菠萝、黄桃),可以制作不同口味的水果派哦。