
原料
蛋清: 140g, 塔塔粉: 1.5g, 细砂糖: 98g, 色拉油: 70g, 牛奶: 55g, 蛋黄: 85g, 低筋粉: 100g, 开水: 83g, 可可粉: 20g, 泡打粉: 1.5g, 盐: 1g, 奶油奶酪: 250g, 淡奶油: 250g, 细砂糖: 50g, 可可粉: 10g
步骤
1将开水和可可粉混合搅拌均匀;
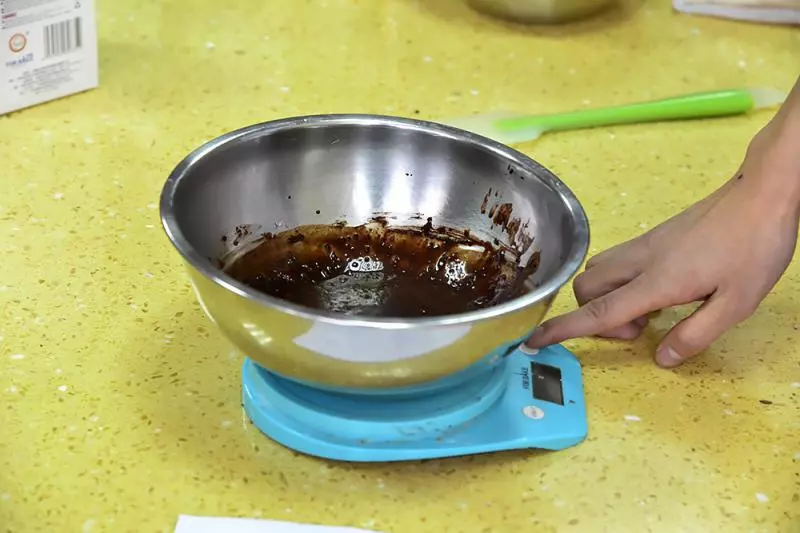
2加入色拉油、牛奶、盐、低筋粉、泡打粉搅拌均匀;
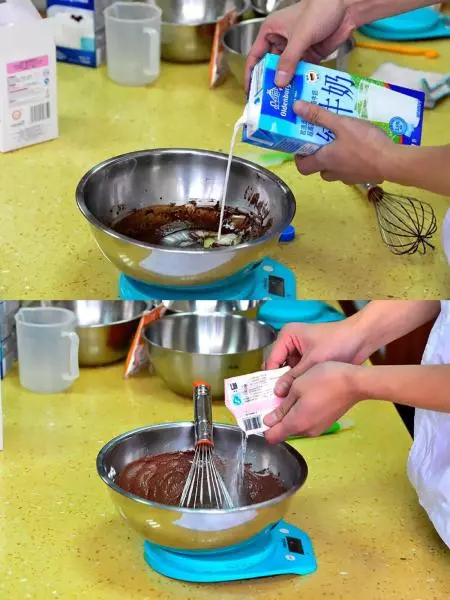
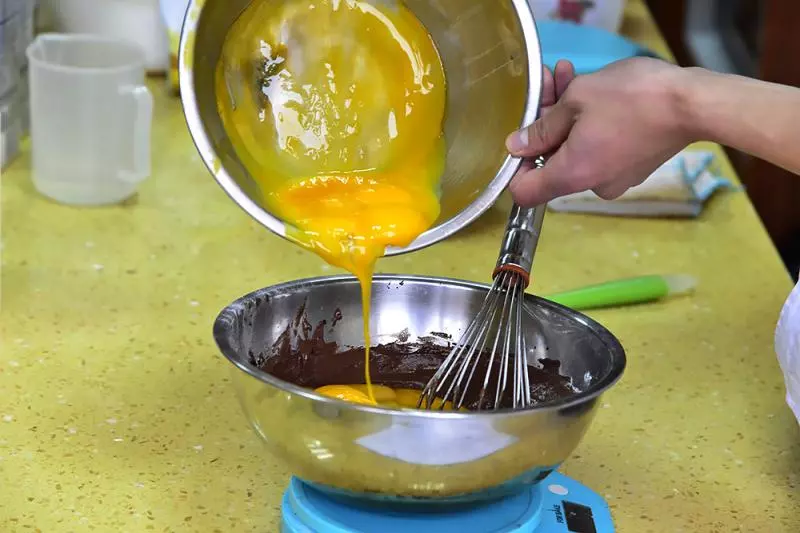
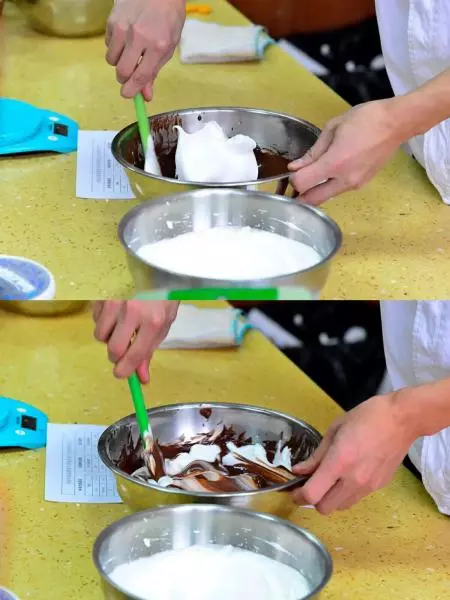
3取蛋黄倒入可可糊,搅拌均匀;
4蛋清加入塔塔粉和细砂糖打发至鸡尾状;
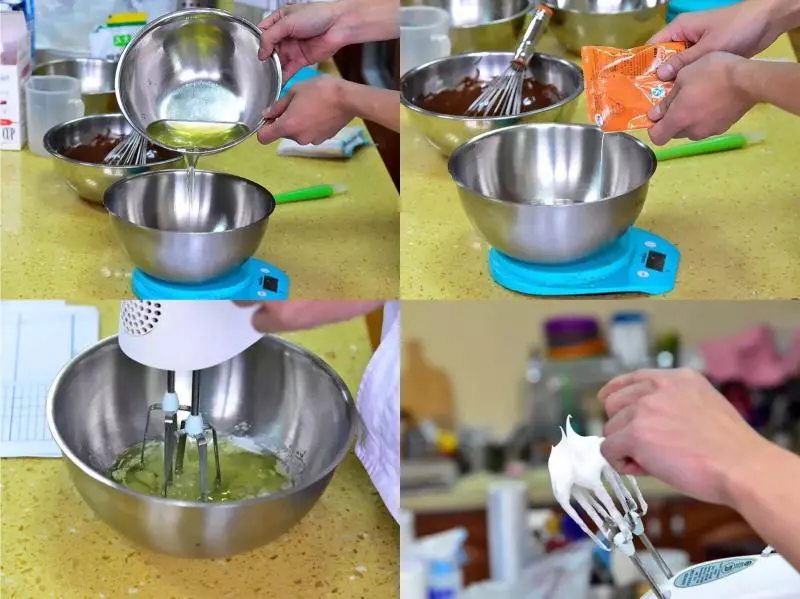
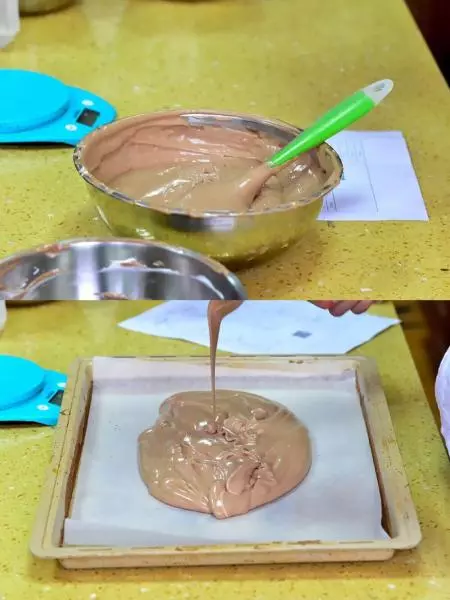
5取1/3蛋清倒入蛋黄糊,切拌+翻拌的方式搅拌均匀(看不见蛋清即可,不可过度搅拌);
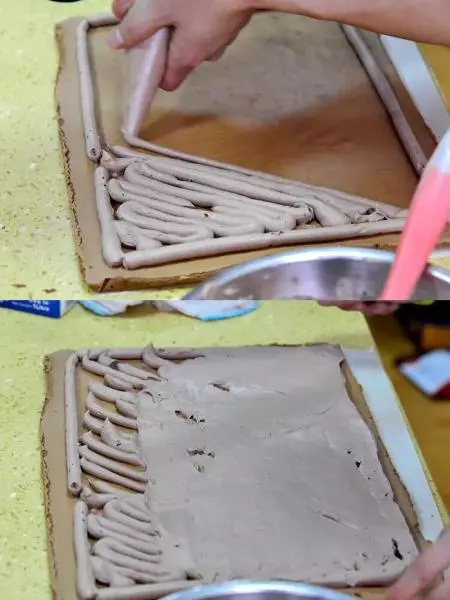
6烤盘铺入油纸,倒入蛋糕糊放入烤箱烘烤(烘烤参考:烘烤温度:上火180°c/下火170°c;烘烤时间:15分钟;烘烤位置:中层)
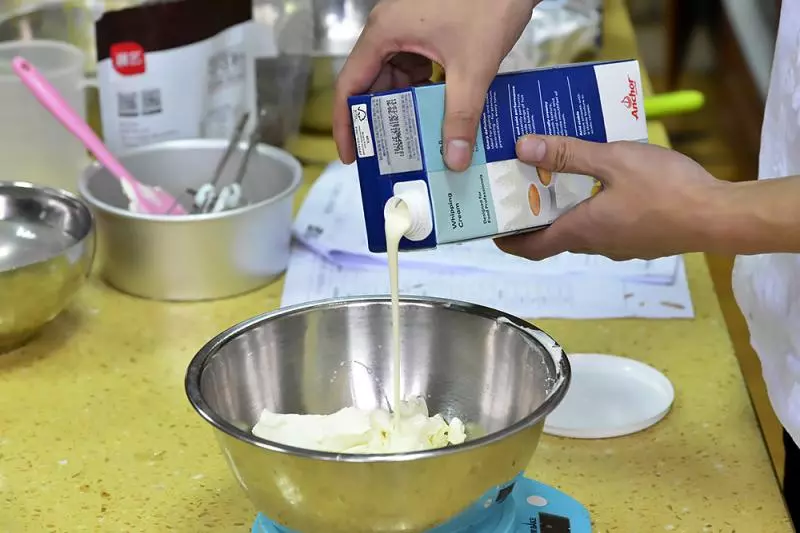
7准备奶油奶酪,倒入淡奶油;
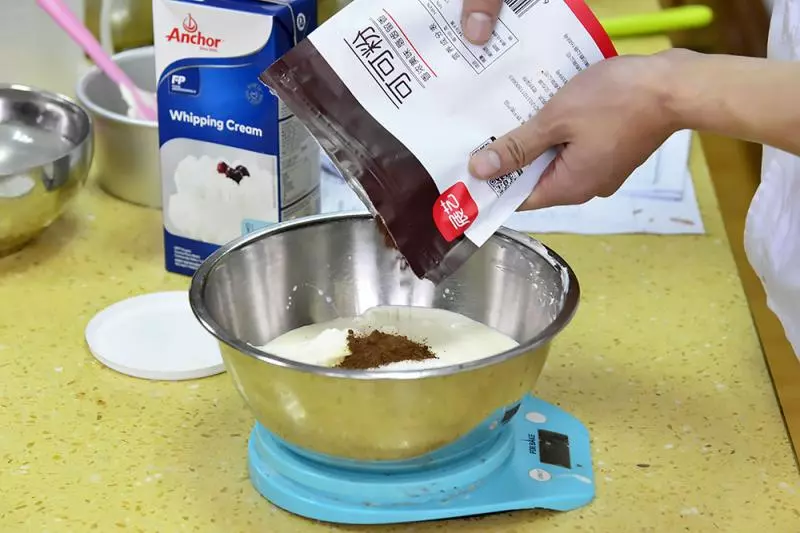
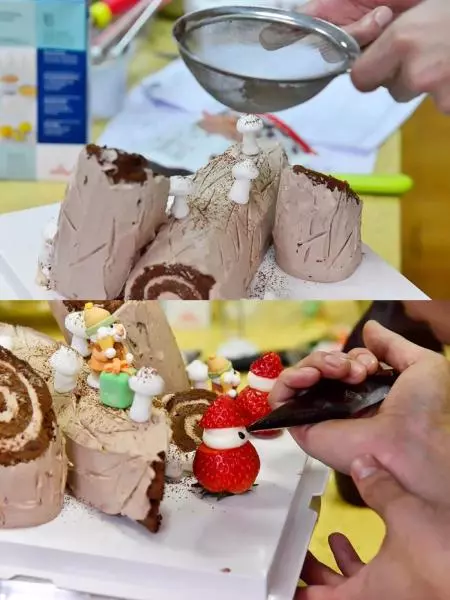
8倒入细砂糖,加入可可粉搅拌均匀;
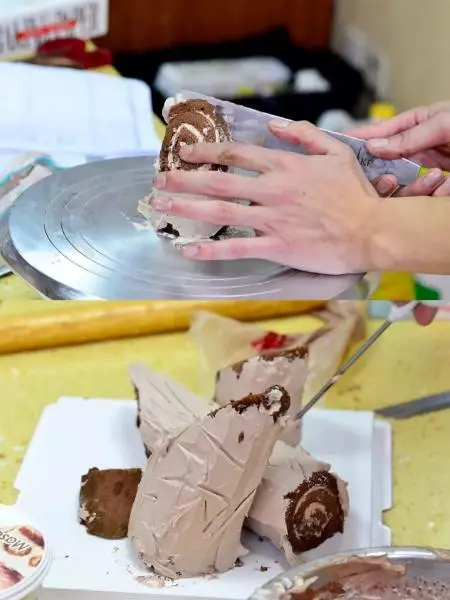
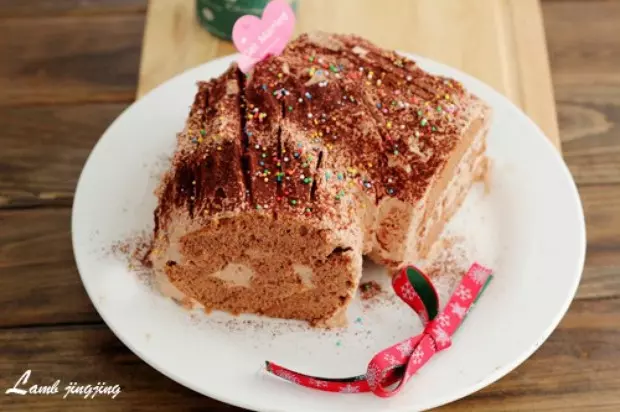
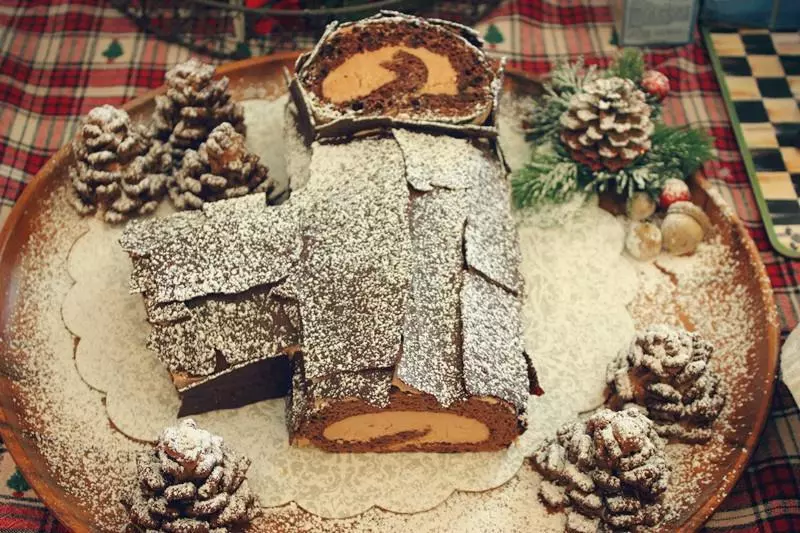
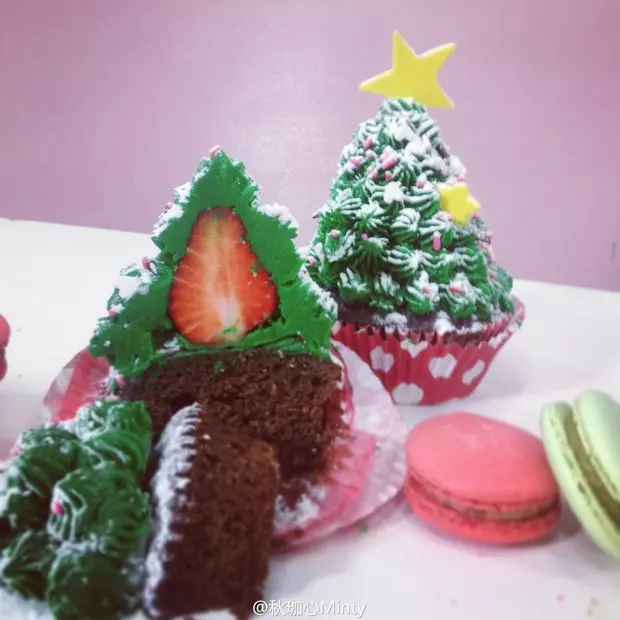
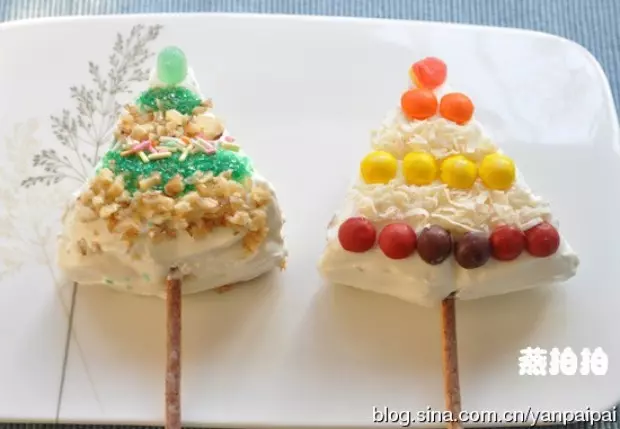
9将戚风蛋糕平铺,夹心均匀铺平蛋糕卷成卷;
10切成树桩,抹上马斯卡彭夹心,在表层随意化线条;
11摆上小摆件,装饰圣诞场景;
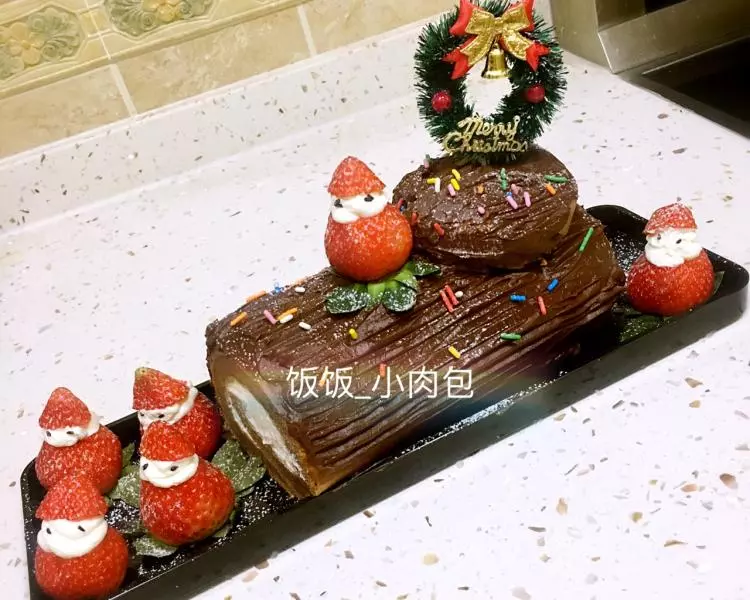
12圣诞树桩装饰好啦~

小技巧
1.步骤1-6为巧克力蛋糕胚制作; 2.步骤7-8为马斯卡彭夹心制作; 3.步骤9-12为树桩蛋糕最后装饰部分。


![[香兰世家]棒棒糖蛋糕](/images/node/25/254939.webp?1638105475)

![[香兰世家]虎皮面包](/images/node/21/214308.webp?1638103148)

![[香兰世家]蓝莓戚风](/images/node/32/320183.webp?1638109124)
![[香兰世家]绿豆糕 冰爽初秋](/images/node/17/177700.webp?1638100968)


![[香兰世家]黄金窝窝头 粗粮当道](/images/node/27/271485.webp?1638106403)
![[香兰世家]五彩果味小馒头](/images/node/10/107561.webp?1638097653)

![[香兰世家]相思毛巾蛋糕卷 相思为谁?](/images/node/33/334915.webp?1638109929)
![[香兰世家]彩绘蛋糕卷之春天的小花](/images/node/30/304495.webp?1638108246)
![[香兰世家]情侣草莓慕斯蛋糕--白色情人节礼物](/images/node/28/288442.webp?1638107370)
![[香兰世家]芒果冻芝士 明媚的春天蛋糕](/images/node/17/178675.webp?1638101029)